Accessing Special Collections

Researchers interested in consulting material from the John M. Kelly Library’s Special Collections: Archives and Rare Books or the USMC Archives can request to view material and book appointments through Special Collections Access, a registration-based system.

Your Special Collections Access account allows you to track and manage requests, duplicate previous submissions, and more. It can also be used to request materials and schedule appointments at the Department of Rare Book and Special Collections, the University of Toronto Archives and Records Management Services (UTARMS) at the Thomas Fisher Rare Book Library, Victoria University Library Special Collections, and the University of Toronto Mississauga Library Archives & Special Collections. Please consult these libraries directly for their guidelines and instructions on accessing their collections.

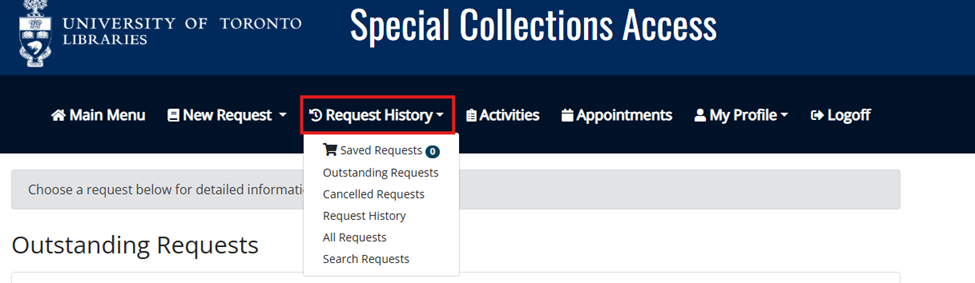
This guide explains how to create an account, request materials, book and modify appointments, and review your request history. If you have questions not covered here, please contact Special Collections staff at specialcollections.kellylibrary@utoronto.ca. For additional information about planning your visit, consult our Researcher Guidelines.

  • Visit aeon.library.utoronto.ca.
  • If you have a UTORid (issued to all students, staff, faculty, and Reader Registration patrons), click the button labelled “Login or Register” under the “UTORid Login” heading, located on the left side of the page.
A picture demonstrating the location of the "Login or Register" button  in relation to the header reading "UTORid Login," as seen on the Special Collections Access webpage. The button is located directly below the header and an explanatory piece of text reading "All active University of Toronto students, staff, faculty, and Reader Registration patrons."
  • Enter your UTORid and password to be redirected to the First Time User Registration form.
  • Review the Reading Room Guidelines, Privacy and Data Collection terms, and FAQ.
  • Enter the required information into the User Information form.
  • Click on the “Submit Information” button at the bottom of the page.
  • After submitting the First Time User Registration form, you will receive an email confirming your registration. You can now log into your Special Collections Access account with your UTORid and associated password.
  • Visit aeon.library.utoronto.ca.
  • If you do not have a UTORid, click the button labelled “Login or Register” under the “UTORid Login” heading, located on the right side of the page.
A picture demonstrating the location of the "Login or Register" button in relation to the header reading "Non-University of Toronto Users," as seen on the Special Collections Access webpage. It is located directly below the header and an explanatory line of text reading "Patrons without a UTORid."
  • Click on the link reading “First Time Users,” located at the bottom of the page.
A screenshot of the Non-University of Toronto Users log-in page for Special Collections Access. The link reading "First Time Users" is highlighted in a red box, and located at the bottom of the picture. The rest of the text, from top to bottom of the picture, reads "Enter your user information below. Then press the Logon to Special Collections Access button to continue," followed by spaces to input Email Address and Password, then a button reading "Logon to Special Collections Access." Following this, a link reading "Forgot Password?" is directly above the "First Time Users" link.
  • Review the Reading Room Guidelines, Privacy and Data Collection terms, and FAQ. Click the button reading “First Time Users Click Here” located at the bottom of the page. By doing so, you acknowledge you have read and accepted the terms above.
  • Enter the required information into the First Time User Registration Form and create a username and password for login.
  • Click the “Submit Information” button at the bottom of the page.
  • After submitting the First Time User Registration form and creating a password, you will receive an email confirming your registration. You can log into your Special Collections Access account with your email address and the password you have chosen.

  • Visit aeon.library.utoronto.ca and log in.
  • In the top toolbar, navigate to the “New Request” heading. This will lead to a drop-down menu listing the University of Toronto Libraries repositories using Special Collections Access. Click on “USMC John M. Kelly Library” to access the Archival Materials Request Form.
A screenshot of the Special Collections Access homepage for logged-in users. Seven headings are at the top of the page, reading from left to right: "Main Menu," "New Request," "Request History," "Activities," "Appointments," "My Profile," and "Logoff." The "New Request heading is in a red box and has been clicked, leading to a dropdown menu of 5 UTL institution names. "USMC John M. Kelly Library" is at the bottom of this drop-down menu and highlighted with a red box.
  • For the material you would like to view, locate the collection/fonds name, Reference Code (if the requested materials have one), and box and file numbers. This information can be accessed on the Discover Archives pages for the John M. Kelly Library’s Special Collections, or for the USMC Archives. If the information you are looking for is not on Discover Archives, please contact Special Collections staff.
  • Enter the information into the appropriate fields in the “John M. Kelly Library’s Special Collections: Archival Materials – New Request” form.
  • Scroll down to the bottom of the page to the “Appointment” section of the form and select “Schedule a New Appointment.”
  • Select a date and time for your appointment and click “Create Appointment.”
A screenshot of the Appointment section of the Archival Materials Request form. There are options to select a reading room, and an existing appointment time, both from drop-down menus. To the right of the Appointment drop-down menu, there is a button reading "Schedule a New Appointment." Clicking this button will reveal a new section with a calendar where users may select an appointment date. To the right of this, there are dropdown menus asking "Expected Length of Appointment," "Appointment Time" and "Appointment Tag." Only the first two of these are marked as required. A button reading "Create Appointment" is at the bottom of the picture and highlighted in a red box.
  • Please note that clicking the “Create Appointment” button does not submit your request for material. To submit a request that is attached to your appointment, make sure the form is complete and accurate, and click on the “Submit Request” button at the bottom of the page.
A screenshot taken of the area directly below the Appointments section of the Archival Material Request Form. There are three buttons reading, from left to right "Submit Request," "Save Request for Later," and "Cancel - Return to Main Menu." The "Submit Request" button is highlighted in a red box.
  • If you would like to add additional boxes of archival material to your request, you must fill out an additional “Archival Materials – New Request” form. You can request up to 10 boxes of material at a time.
  • You can attach each request for material to any upcoming appointments you have already made. To do this, scroll down to the “Appointment” section of the form, and select a time from the “Appointment” dropdown menu.
  • Special Collections staff will respond to your request and confirm your appointment within 2-3 business days.
  • Visit LibrarySearch and locate the entry for the rare book that you would like to consult.
  • Navigate to the item’s LibrarySearch entry by clicking on the title.
  • Scroll to the “Locations” section of the item’s entry. If it is at multiple holding locations, expand the St. Michael’s College Rare Book option.
  • Click on the “Special Collections Access” link. If you are not already logged in, this will open the Special Collections Access log-in page. Once you have logged in, a pre-populated form entitled “John M. Kelly Library’s Special Collections: Rare Books – New Request” will appear.
  • Review the pre-populated form for accuracy. If there are multiple volumes or copies of the item, you will need to specify your preference in the relevant fields.
  • Scroll down to the bottom of the page to the “Appointment” section of the form and select “Schedule a New Appointment.”
  • Select a date and time for your appointment and click “Create Appointment.”
A screenshot of the Appointment section of the Rare Books Request form. There are options to select a reading room, and an existing appointment time, both from drop-down menus. To the right of the Appointment drop-down menu, there is a button reading "Schedule a New Appointment." Clicking this button will reveal a new section with a calendar where users may select an appointment date. To the right of this, there are dropdown menus asking "Expected Length of Appointment," "Appointment Time" and "Appointment Tag." Only the first two of these are marked as required. A button reading "Create Appointment" is at the bottom of the picture and highlighted in a red box.
  • Please note that clicking the “Create Appointment” button does not submit your request for material. To submit a request that is attached to your appointment, make sure the form is complete and accurate, and click on the “Submit Request” button at the bottom of the page.
A screenshot taken of the area directly below the Appointments section of the Rare Books Request Form. There are three buttons reading, from left to right "Submit Request," "Save Request for Later," and "Cancel - Return to Main Menu." The "Submit Request" button is highlighted in a red box.
  • If you would like to add additional boxes of archival material to your request, you must fill out an additional “Rare Books – New Request” form.
  • You can attach each request for material to any upcoming appointments you have. To do this, scroll down to the “Appointment” section, and select the appropriate appointment from the “Appointment” dropdown menu.
A screenshot of the Appointment section of Rare Books form, with the Appointment dropdown menu engaged. There is one existing appointment in the dropdown menu, and it is highlighted. A red box highlights the appointment dropdown menu.
  • Special Collections staff will respond to your request and confirm your appointment within 2-3 business days.
A screenshot of the Special Collections Access homepage for logged-in users. Seven headings are at the top of the page, reading from left to right: "Main Menu," "New Request," "Request History," "Activities," "Appointments," "My Profile," and "Logoff." The "Request History" heading is highlighted with a red box. It has been clicked leading to a drop-down menu with options "Saved Requests," "Outstanding Requests," "Cancelled REquests," Request History," "All Requests," and "Search Requests."
  • Navigate to the appointment you’d like to change and select the “Actions” button.
  • On the resulting dropdown menu, click on “Edit Appointment.”
A screenshot from the Appointments page on the Special Collections Access site. It shows one appointment, whose title is written on the left side of the page. On the right side of the page, there are two buttons reading "Details," and "Actions." The "Actions" button has been clicked leading to a drop-down menu listing the options "Edit Appointment," "Cancel Appointment," and "Download iCalendar." The "Actions" button and the "Edit Appointments" option are both highlighted in red boxes.
  • Select a new date, time, and/or length for your appointment, and click on the “Submit Appointment” button to confirm the new time.
  • Visit aeon.library.utoronto.ca and log in.
  • Click on the “Request History” heading.
  • A drop-down menu will appear with the following options:
  • “Saved Requests” will direct you to a list of requests you have previously saved.
  • “Outstanding Requests” will direct you to a list of your active requests.
  • “Cancelled Requests” will direct you towards all requests that have been cancelled by the user or Special Collections Staff.
  • “Request History” will direct you to a list of all requests that are inactive—or already complete.
  • “All Requests” will direct you to a full list of all requests made, regardless of active status.
  • “Search Requests” will direct you to a search bar where you can search keywords from your request history.
A screenshot of the Special Collections Access homepage for logged-in users. Seven headings are at the top of the page, reading from left to right: "Main Menu," "New Request," "Request History," "Activities," "Appointments," "My Profile," and "Logoff." The "Request History" heading is in a red box and has been clicked, leading to a dropdown menu with options "Saved Requests," "Outstanding Requests," "Cancelled Requests," "Request History," "All Requests," and "Search Requests."
  • Select the option that is most helpful from the drop-down menu. Selecting “All Requests” is recommended if you are unsure of the status of your requests.
  • To re-request material, locate the relevant request and click on the “Actions” button.
  • Select “Clone Request” from the resulting drop-down menu.
  • This will populate a Material Request Form with the same information as this request. If you would like to modify the material you are viewing, you may edit the form.
  •  In the “Appointment” section of the form, either schedule a new appointment to view the material, or select an existing appointment from the drop-down menu.
  • Click the “Submit Request” button at the bottom of the form.

Instructors may wish to use Special Collections or archival material to help them teach in classes.  Before you can request materials to use in class, you must submit a Teaching Request Form and register for Special Collections Access.

Once you have confirmation from Special Collections staff that your class can go ahead, you will receive an email indicating that you have been added to an “activity.”

There are two methods of submitting material requests for classes:

  1. Requesting Individual Items
    • Submit a request using the appropriate Material Request form.
    • In the “Appointment” section of the form, a field entitled “Request for” will appear once you have been added to an activity. From the drop-down menu, select your class.
    • Submit additional forms in the same manner for each item.
  2. Requesting by Spreadsheet
    • If you are submitting a larger number of requests (typically over 10), you may find it helpful to submit your requests in a single spreadsheet to avoid having to submit many request forms.
    • Contact Special Collections staff at specialcollections.kellylibrary@utoronto.ca and request the template spreadsheet.
    • Fill out the template, using a different row for each request.
    • Send the resulting spreadsheet back to Special Collections staff.